Fixing a hole in a Brigg & Stratton Engine Crankcase
Posted by Benjamin Close on September 21, 2011 under Country Living, Repairs | ![]() 9 Comments to Read
9 Comments to Read

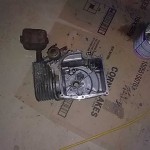
Briggs & Stratton 8hp Engine Internals Complete
This article details a method I used to fix a large hole in the crankcase of a 8hp Briggs & Stratton Vertical Engine.
First a little background:
When we first bought our property we quickly realised we would need either a tractor or a ride on lawn mower. Whilst I would have loved a tractor, cost meant we went for a ride on lawn mower. However this ride on mower was unique. It was a 1977 Rover Ranger mower. Go Kart style steering, Briggs and Stratton engine, all steel construction, etc. Built solid as a rock but it was in need of some work. After about 6 months restoring the mower it was ready for testing – restoring the mower not the engine that is.
With the mower restored I added some oil, fuel/gas and gave the engine pull cord a tug, then another tug, and another…eventually I got the engine going. The mower worked great! Cut through thick grass, drove hard, ran smooth -though fast until… I hit a brick. Hidden in the long grass was a house brick and after hitting it at full speed something had to give. Normally this would be the mower blades. However, unknowingly at the time, the previous owner thought it was a good idea to weld the blades fixed. The engine did not like this and after spluttering a little decided the connecting rod (conrod) was the piece of metal that had to break. Sadly as it broke it put approximately a 5cm/1.5″ hole in the crank case wall. Not surprizingly the mower then stopped.
I was devastated. Months of work were now down the drain. A hole in the crankcase surely was unrepairable – especially since I’d never opened up an engine before. Consequently the mower was wheeled into the shed and left for a week. That week was a slow week. However, it also gave me time to think about the motor with a clear head. In particular: Why is a hole in a crank case unrepairable? After eventually pulling the engine apart I came to the conclusion I would try and repair the hole.
The hole was in the side wall, the conrod had created a few additional cracks as it flew through the crankcase side wall, but in general the engine looked repairable. Luckily when the conrod went, the various small pieces of broken conrod didn’t destroy any of the valve stems, oil slinger, etc. The main damage was the side wall.
Initially I thought “I’ll just weld something over it”. That was a nice theory but I very quickly discovered that the crank case was made from cast aluminium. One touch with the Arc welder and it would turn to molten metal! (Aluminum melting point is quite low in comparison with steel – about 700 degrees C vs 2300 degrees C). Hence my options were either TIG weld the case or find some other method of repairing it.
Sadly I’m not rich enough to own a TIG welder and none of my friends had one either. Hence I was left with finding some other method of welding aluminium. After searching Google I found out about a product called Durafix. Durafix is a type of welding rod, or more accurately a solder rod that can be used on aluminium. A little more searching revealled there was a number of products on the market that do a similar products. These can be found by searching for the names Alumaloy, Aladdin, HTS2000. They all do the same thing. So I started looking around for some of these welding rods. Sadly they were not cheap. Hence before I bought them I thought I’d check both prices of new engines as well if the rest of the engine I had was still any good.
New engines turned out to be much more expensive than I thought and I sadly I soon found the piston didn’t run smooth.

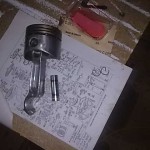
Piston with scoring marks from sanding to fit cylinder
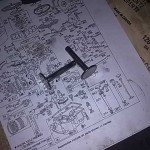
One of the side effects of the conrod giving way is the rod arm in the piston had slightly deformed the piston. Hence it wasn’t correctly round any more. At this point I realised I needed a parts list. Going to Briggs and Stratton’s website I punched in the engine numbers and guess what – the parts list was still available. So after ringing around locally and checking Ebay I discovered a new piston wasn’t cheap. Especially since I didn’t know if I could repair the engine. I left the entire project for a few more weeks whilst I thought about what to do.
I eventually decided that if I could get the piston running smoothly I’d get the welding rods and try and repair the crank case. After all a set of aluminium welding rods could always come in handy. The problem was how to fix the piston. Everything I read said it had to be machined round, or replaced. I thought to myself, this is just a lawn mower, not a Ferrari V12. So I did the next best thing. I put the piston in the vice and crimped it until it was reasonably round. This got most of the shape back but it did still catch a little. (A note for anyone attempting a repair, I found the piston would only correctly work when put in from the bottom of the cylinder, it wouldn’t fit from the top).
To fix the small catch that it had left I sanded the side wall of the piston. I figured since it’s only the side wall the worst that would happen is a little movement (later I found out this is called piston slap and can be harmless or can destroy the rings depending on the amount of movement).
With the piston now running smooth I bought aluminium soldering rods off Ebay (It was cheaper to buy them in the US and get them shipped to Australia than buy them in Australia). After a few weeks they arrived and I replicated a couple of youtube videos I’d seen that welded coke can together. This was pretty easy stuff to work with – so I thought. Turns out small things are easy! The biggest issue was I was working with a large crank case.
After cleaning up the crankcase as best as I could with degreaser, some elbow grease, water and a stainless steel brush (as it
doesn’t cause the aluminium to oxidise) I began to heat the case. I’d borrowed a propane blow torch for the job and also had my electric heat gun. Initially I used the heat gun to get the entire crank case to a temperature where it was hot to touch (Electricity wasn’t a consumable like the propane tank). I then used the propane torch in the cracked areas on the welding rods. It took ages!! Heating, heating, and more heating. Eventually the crank case got hot enough.
(At this point a little side note. The best way to use the welding rods is to heat the surface you want to repair. The rods are designed to melt below the melting point of aluminium. If you heat the rods they just turn in to little solder blobs but never cling to the surface your trying to weld. If you heat the surface your trying to weld then touch the rod to it, the solder melts and clings to the surface).

Finished Weld
With the surface now hot enough (hot enough to smoke the plastic grips in my vice), I began welding…er soldering. It was at this point I realised fixing this would be a little tricker than expected. You see the rods are more of a solder than a welding compound. My aim was to weld a piece of scrap aluminum I’d picked up at a local steel recycler over the hole on the outside of the crank case, then seal the inside with more weld. Being a solder this was a difficult task. The outside weld went perfect. The inside on the otherhand was not so successful. Turns out because the rods are a solder, touching the inside of the piece of aluminium covering the hole, ended up shifting the outside (as the piece was sitting on a layer of molton solder). Quite a few attempts later I had finished the repair.

Sealing the inside of the crankcase with liquid gasket
After 2 hours cool down time (the case took that long). I then did a water test for leaks. Drip………….Drip…….. Drip……… sadly the weld was not water tight. Due to time constraints and limited propane, sadly I could not reweld the case. Instead I applied liquid gasket to the inside of the weld, let it set the retried the water test – I was now water tight – success!
So with the case welded, it was a matter of putting the engine back together. (See the shots below for step by step instructions). By this time I had already bought a new after market conrod which fitted perfectly and despite quite a few mistakes where I had to take bits apart to put other bits in I eventually got the engine back together.
With the engine together, I added oil, petrol a new spark plug and crossed my fingers. I tugged on the pull cord….then again… and again… finally, the engine coughed to life. After quite a bit of spluttering whilst I adjusted the carby, it was running really nice. Time to put some load on it – This time I had removed the fatal welds on the mower blades, if I hit anything THEY were going to give first.
The mower worked a treat, ran smoothly – after a few adjustments (the safety wire on the flywheel was rubbing against the flywheel cover making a awful noise) and kept running well.. so I thought.
It wasn’t until about 15 minutes into mowing I noticed the excess smoke coming from the mower. There was a little smoke as it accellerated but the amount of smoke had certainly increased quite noticable. Not wanting to destroy the Briggy any more I stopped the mower to inspect what was happening. Sure enough there was a small leak of oil through the weld.
You see Briggs & Stratton engines are designed to run with a negative pressure in the crank case. This helps suck the oil back down when the piston drop and prevents excessive oil burning. Without this negative pressure the oil get up to the combustion chamber and burns – also makes a nice black coated spark plug.
That’s what was happening here. The leak in the crank case weld was letting air in, stopping the back pressure and causing oil to burn. As a quick fix I wedged some metal putty over the hole, topped up the oil and tried again.
It still smoked and leaked. Though dramatically less than the first time. A little more putty and practically no leaks.
So now 5 months down track with the mower use pretty much ever weekend (A lot of grass grew whilst I was repairing it). The repaired B&S 8hp is still going strong. By using some premium unleaded (98 octane) it’s got a lot more punch, and getting the right spark plug gap (0.3″/.72mm) it works very well.
When summer comes and I can’t mow due to the temperature (due to bush fire regulations). I intend to rip the engine apart again and reweld-solder the cover plate I put over the hole, and not give up until it’s water tight.
I’ve also learnt a lot in the process of doing this. All about engines, how to get them running, keep them running etc. A tip I want to try with the welding is to use a dremel and carve a V groove before welding. Especially over the cracks that are hairline but widen as the engine heats up this should fill them better. (This tip was from a site asking about welding a motorbike crank case with JBWeld – though I can’t find the link again). I also think I’ll purchase a rebuild kit and replace the rings to help eliminate smoke due to a worn piston/rings. The engine runs well enough to justify this. The rebuild kit also has a complete gasket set which will help.
So if suddenly you find yourself with hole in your crank case, a broken conrod and a warped piston, but otherwise the engine looks fine, don’t believe everyone that the engine is scrap metal. You just might be able to fix it yourself!
Putting a 8hp Briggs and Stratton Engine Back Together
-
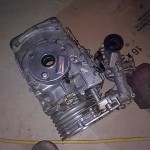
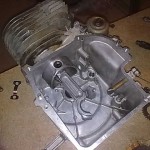
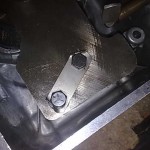
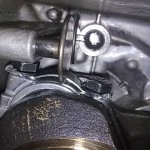
- Another view of the sealed hole
-
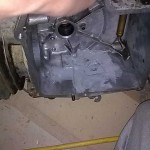
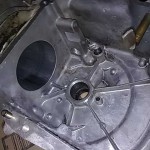
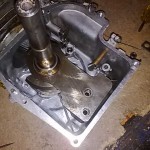
- Bare Crank Case (Governer and valves still installed)
-
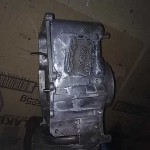
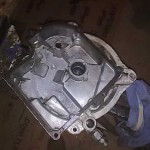
- Top of crank case
-
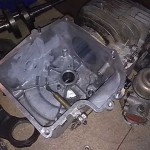
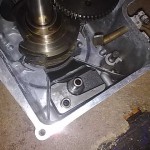
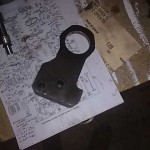
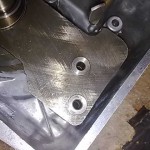
- Repaired side of crank case
-
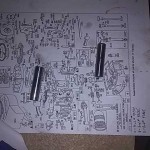
- B&S 8hp Engine Parts
-
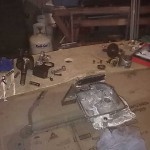
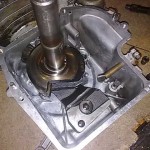
- Work bench with hole for crank to sit in when assembling engine
-
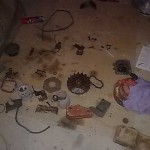
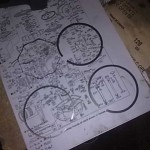
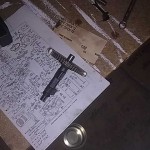
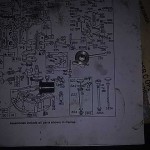
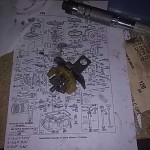
- Part breakout
-
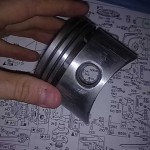
- Piston with scoring marks from sanding to fit cylinder
-
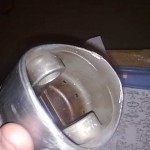
- Top of piston
-
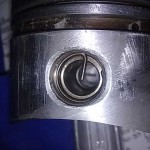
- Close up of retaining clips in piston
-
- Inside of piston
-
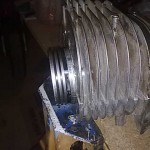
- Piston Rings
-
- Installing Piston Ring (after reshaping)
-
- Installing the piston rings (must be done with piston already installed)
-

- Another view of the piston
-
- Putting together the piston (Control, rod pin, piston, retaining clips)
-
- Counter weight side 1
-
- Wide view of empy crankcase
-
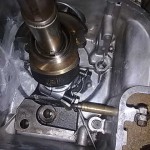
- Installing piston
-

- Installing counter weight side 1
-
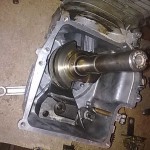
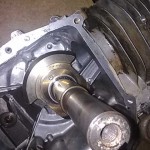
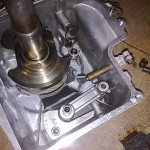
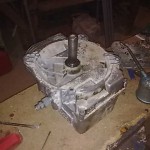
- Installing crank
-
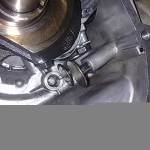
- Connecting conrod to crank
-
- Putting bolts in conrod
-
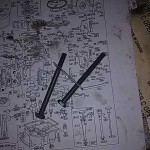
- Valve stems
-
- Installing valve stems
-

- long view of valve stems
-
- Cam Gear
-

- before Installing counter weight connecting rod
-
- Counter weight bushings
-
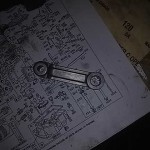
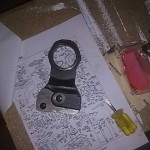
- Counter weight connecting rod
-
- After counter weight connecting rod is installed
-
- Second half of counter weight
-
- Second half of counter weight installed
-
- Counter weight spacers
-
- Counter weight spacers installed
-
- Counter weight bolts
-
- Counter weight bolts installed
-
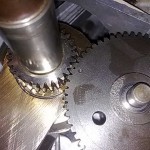
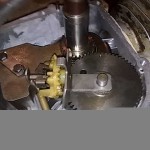
- Aligning the cam gear with the crank mark
-

- Engine almost together
-
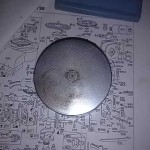
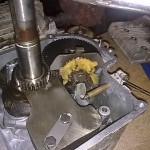
- Oil Slinger
-
- Oil Slinger installed
-
- Briggs & Stratton 8hp Engine Internals Complete
-
- Bare engine internalls
-
- Crank case base installed, engine now sealed
-
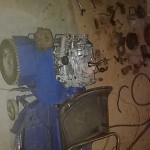
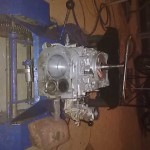
- Engine installed on mower
-
- Installing the head gasket and head
-
- Conrod/Valve stem clearance.. very close
Rebuild Kit | Carbzine Paintball said,
[…] results="100"]Rebuild Kit[/affmage] [affmage source="amazon" results="10"]Rebuild Kit[/affmage] [phpbay]Rebuild Kit, 100, 16045, ""[/phpbay] Where is a place where I can buy a carb rebuild kit for…t cost me a ton? I would prefer OEM, but if anyone knows a reputable after market company, that will […]
Best lawn mower said,
Thanks for the share! Very useful info, looking to communicate!
How to Repair Briggs and Stratton Engines, 4th Ed. - Lawnmower Engines said,
[…] Fixing a hole in a Brigg & Stratton Engine Crankcase – ClearChain […]
Umski said,
Great article! I have the same issue with an 8hp B&S – bottom end parted company with the conrod and left a big hole in the block. Unfortunately I think it’s terminal as it took out the starter mountings too 🙁 Good guide on welding/soldering cast aluminium though!
GloSol said,
Thats a bunch of work to fix a hole. The side of the case is there just to keep the oil in it. It’s not structural, and I really doubt this method of aluminum welding would have any structural properties anyway.
I patched a 2″ hole in the side of my Kohler Command 25hp v-twin using a fiberglass patch and multiple coats of resin. It does not leak, and I only had to do it once.
Jennifer Gates said,
The post is interesting but I can never fix anything by myself. LOL. Thanks!
Engine Builder s Handbook – Motorcycle workshop manuals said,
[…] Fixing a hole in a Brigg & Stratton Engine … – ClearChain This article details a method I used to fix a large hole in the crankcase of a 8hp Briggs & Stratton Vertical Engine. First a little background: When w […]
Schmierstoffe said,
Nice post Benjamin, You explained each and every point very clearly. Thanks for sharing with us. Good job..
Schmierstoffe Deutschland said,
Thanks for sharing the post.. It was very informative. Explanation with picture is really very good idea. All the best..
Add A Comment