
Inspiron 8000
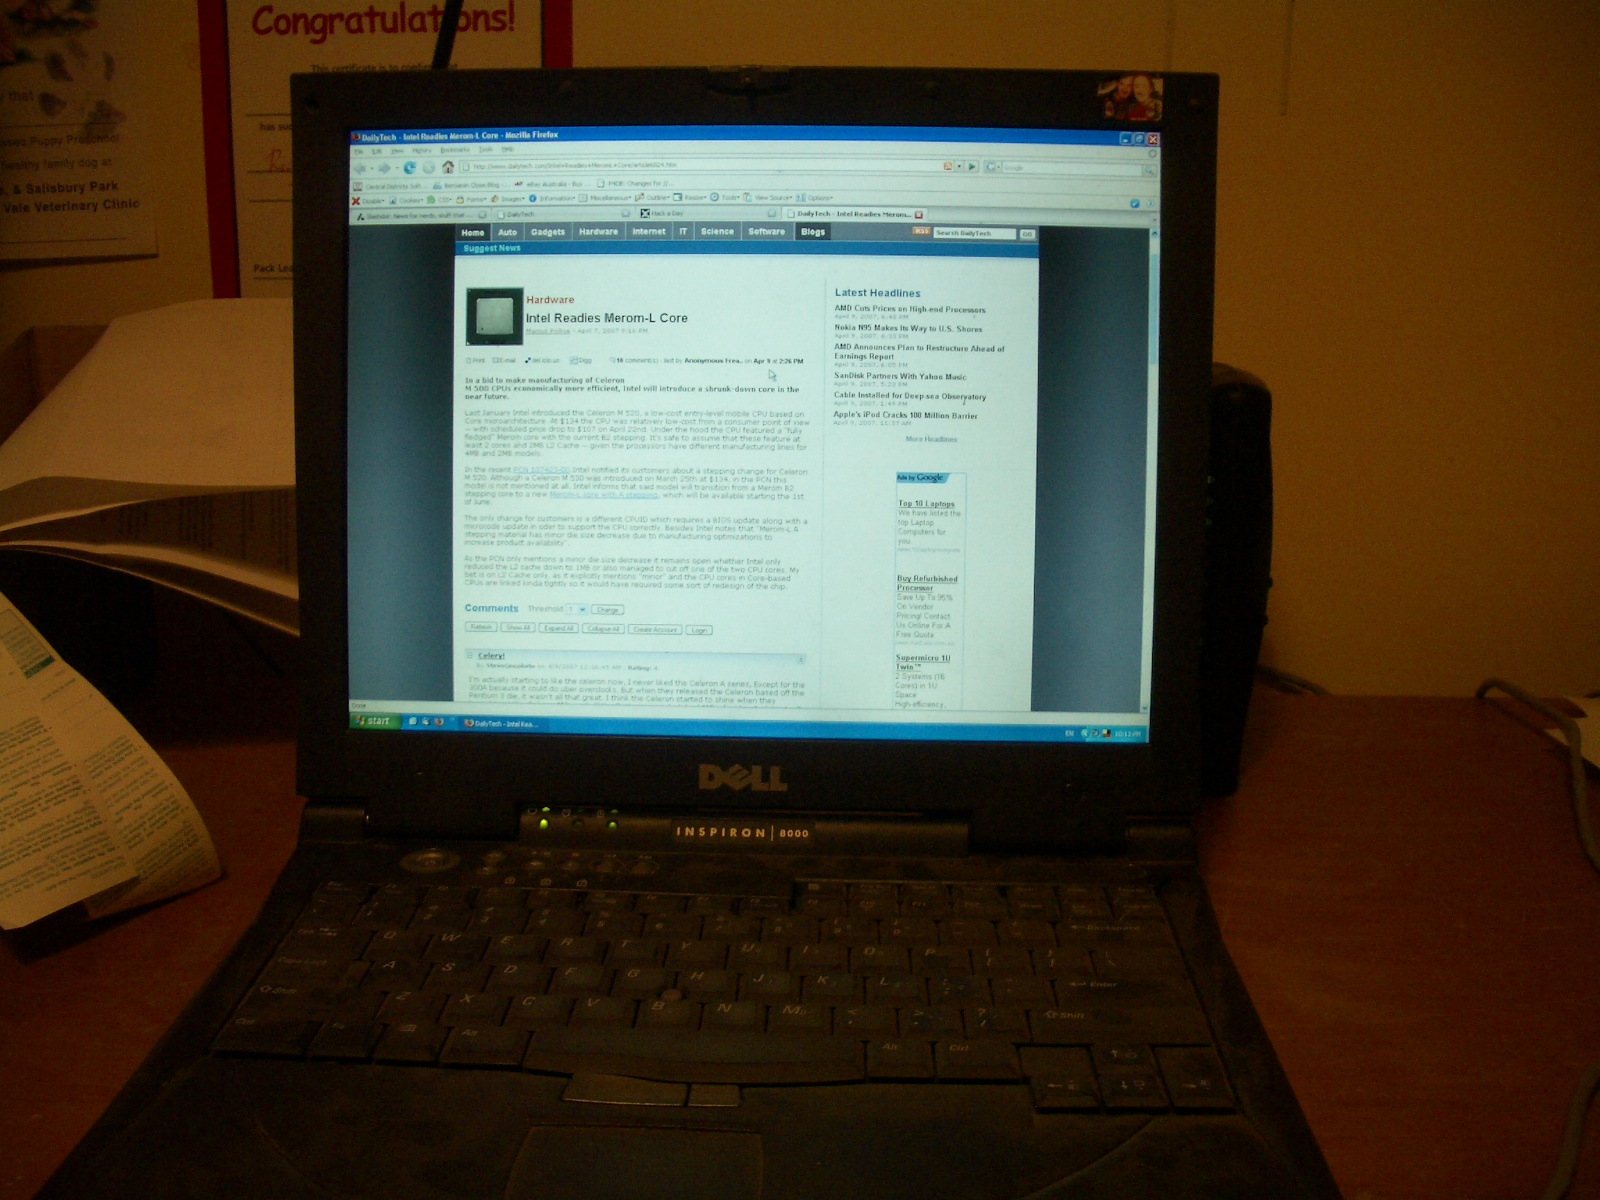
It all began in February 2001. I bought a Dell inspiron 8000 laptop, with a 1400×1050 capable screen and I was happy. Over time however, things slowly broke. I was lucky enough to get a free upgrade to a 3 year next day onsite warranty, and over time got the HDD replaced twice and keyboard replaced once (The laptop was running 24×7 and was my main machine). Alas, sadly event the 3 year warranty expired – but things were still running sweet. The laptop still worked like a charm, until that fateful day in March 2006.
The LCD screen had been getting dimmer over time, something I attributed to old age. But that day in March proved to be the start of a very long but in the end successful hack – A hack to fix the laptop screen!
For those that aren’t aware, most LCD screens have a single fluro backlight which illuminates the screen. Like any fluro, over time they get dimmer, take longer to turn on, and their colour changes. Sadly like any fluro, eventually they blow.
I contacted Dell requesting a price for a new screen but the $765 price tag did not impress me. Even after market displays were rather costly at $400. Ebay was not much better. I have the 14.1″ SXGA screen – I wanted the higher resolution of 1400×1050. However, everything I could find was only for the 14.1″ SVGA screen with a resolution of only 1024×768, or the 15″ screen with a resolution of 1600×1280 (I think).
I did a few google searches to see what else I could do.. new laptop, put screen in for repair (yeah right, I’m in Adelaide, no one here to do that & shipping would kill me).. then I found something useful. A forum which indicated how someone had replaced the backlight themselves. A few more searches and I foundhttp://iantha.net/ccfl.htm.
Bingo, now I knew I’d found the cheap solution.
Hence I decided to fix the screen myself.
Symptoms
To be honest I’d known the screen was dying for a while. Initially the screen got quite dim and I found I had the brightness turned up all the way. Next I noticed the screen had some pinky purple sections appearing around the edges. These weren’t bright colours, more of a tint to the white that should have been showing.
Next there was the issue that when the screen turned on, it was extremely dim and slow got brighter. The big thing that gave me the hint something was on it’s way out was the fact that the screen would just die after some time. Basically if I shined a torch on the screen I could still make out what was on the screen but there was no light behind any of it.
Diagnosing What was wrong

Initially I didn’t know exactly what the problem was. The back light for most laptops (well in the 2000’s anyway) are a fluorescent tube know as a cold cathode fluorescent lamp (CCFL). They work by an electrical charge exciting a gas (often mercury vapour) which causes electrons to jump hence causing a UV light to be emitted. This light then hits the phosphorescent coating on the inside of the CCFL and causes it to glow for a split second. This glowing creates light. (For a full description about fluro’s see the wikipedia pagehttp://en.wikipedia.org/wiki/Fluorescent_lamp)
Here’s the catch. In order to excite the gas, a high voltage is needed. This voltage is provided by an invertor. Now the big issue was to work out if it was the CCFL or the invertor that had died.
I tried to work out what the issue was and after more google searching, I came to the conclusion it was the invertor. Due to so many forum postings indicating the invertor was more likely to go than the backlight. Hence I began the hunt for a new invertor. First I had to work out what invertor I needed.
I found a trusty screw driver and began to pull apart the laptop.
- Removed the face plate where the buttons were
- Undid the screws holding on the flexible cable for the LCD
- Pulled out the LCD cable
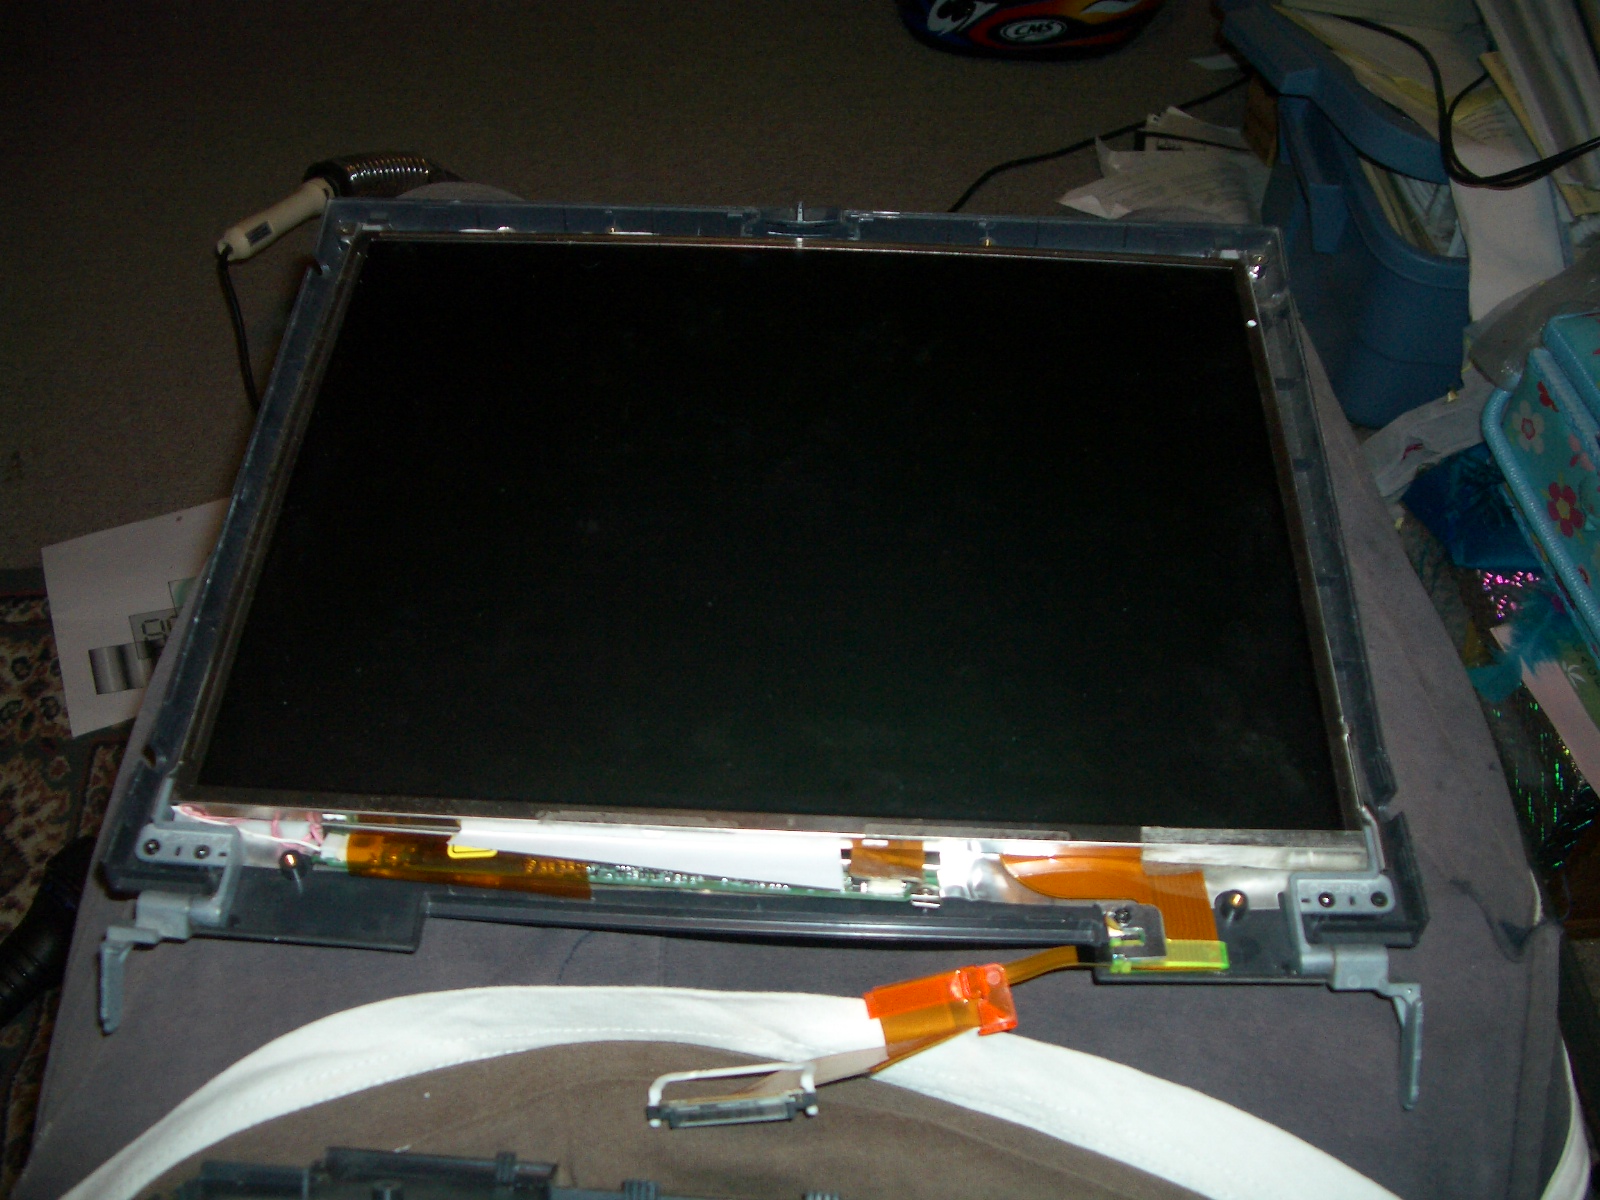
At this point the LCD could now be separated from the laptop
- Removed the rubber grommits used to both cover screw holes and make the protect the screen when it shut
- Gently found the clips around the edge of the plastic bezel which held the front and the back plastic panels together
- Removed the few screws holding the screen to the rear plasic bezel
Now I could clearly see the model of the screen and also the invertor.

The invertor was attached to the laptop with one screen and two cables that cliped in to it. One came from the ribbon cable that went into the laptop – this supplied power to the invertor. The other was a much thicker cable that carried the higher voltage to the backlight.
The screen I had was a Samsung LTN141P2 model screen. The invertor had various info on it including the model numbers:
- k02I024-01
- LTN141P2
I later found the invertor was made by Ambit Electronics – though I could not find their website.
Hence I pugged the numbers into google and off I went searching. Sadly I found my laptop was really old. There were lots of places that referenced the invertor but sadly none of them had it in stock. Ebay proved to have a few, but they were both expensive ($40+) and the shipping would kill me (I’m located in Australia, most places charged $30USD+ for shipping).
Hence I decided just to check back every now and again, looking for a bargin.
About 2 months later I found a website (Sorry Can’t find the URL now) that gave a good run down about what a company who fixed LCD’s could fix. This website gave me a clear indication that the problem wasn’t my invertor but my CCFL instead. The page had a video indiciating the exact symptom my screen suffered – Ie: I’d turn the laptop on, the screen would flicker to life for a few seconds then die.
This gave me renewed hope. Hence I decided to rip appart the actual LCD panel and replace the backlight.
Replacing the CCFL
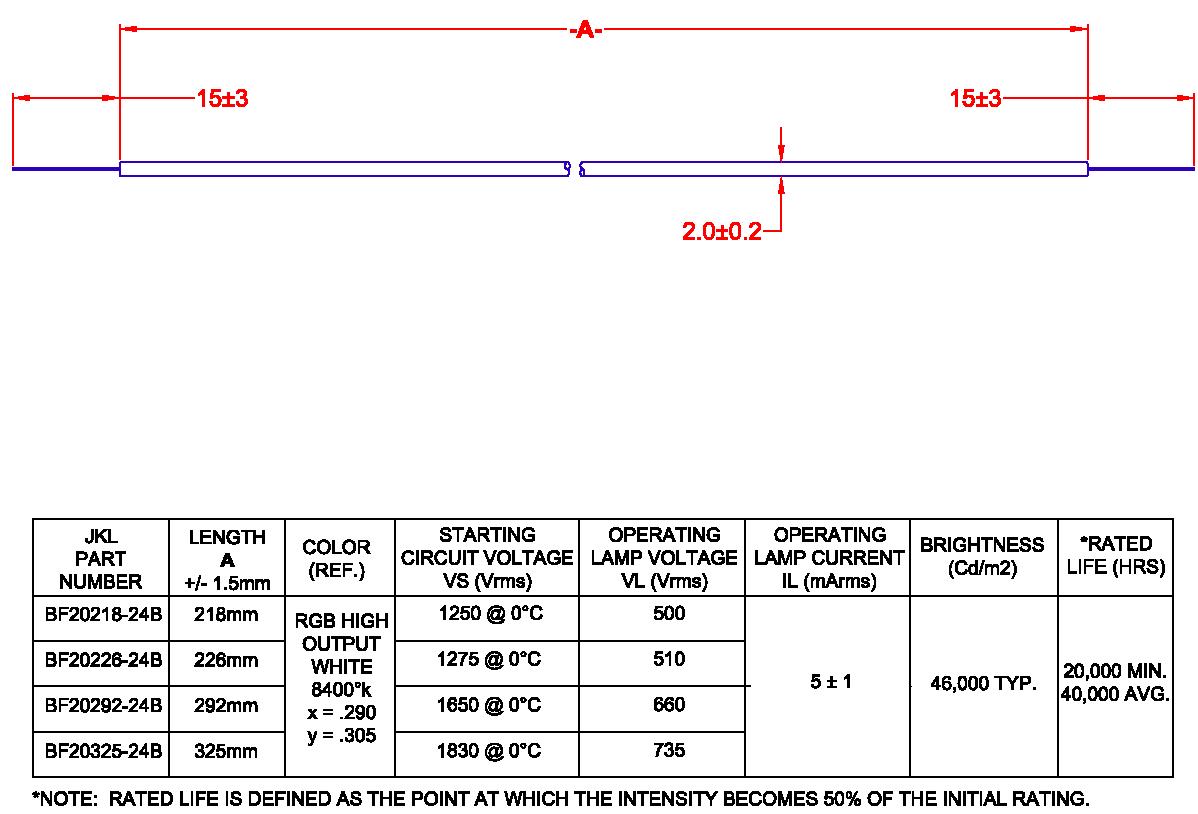
Before destroying what was left of my screen, I decided to see if I could find a replacement backlight. A little more searching reveled the website:http://www.jkllamps.com/index.cfm?action=fam&tid=2&fID=45
This site lists the backlights related to specific laptops – Excellent! The backlight I needed was model: BF20292-24B. I also thought Wow! The CCFL needs 660volts to run – you could kill yourself on this thing! So I decided to be a little careful.
I then set about ording a backlight. The cost of the lights were fine (~$15 AUD). Then I saw the shipping cost – $40USD! Ouch. Thankfully the lab I worked for occasionally ordered from Digikey (one of the led distributors). Another month later, I purchased the backlight and added the light to one of the lab’s orders to avoid having to pay the shipping charge.

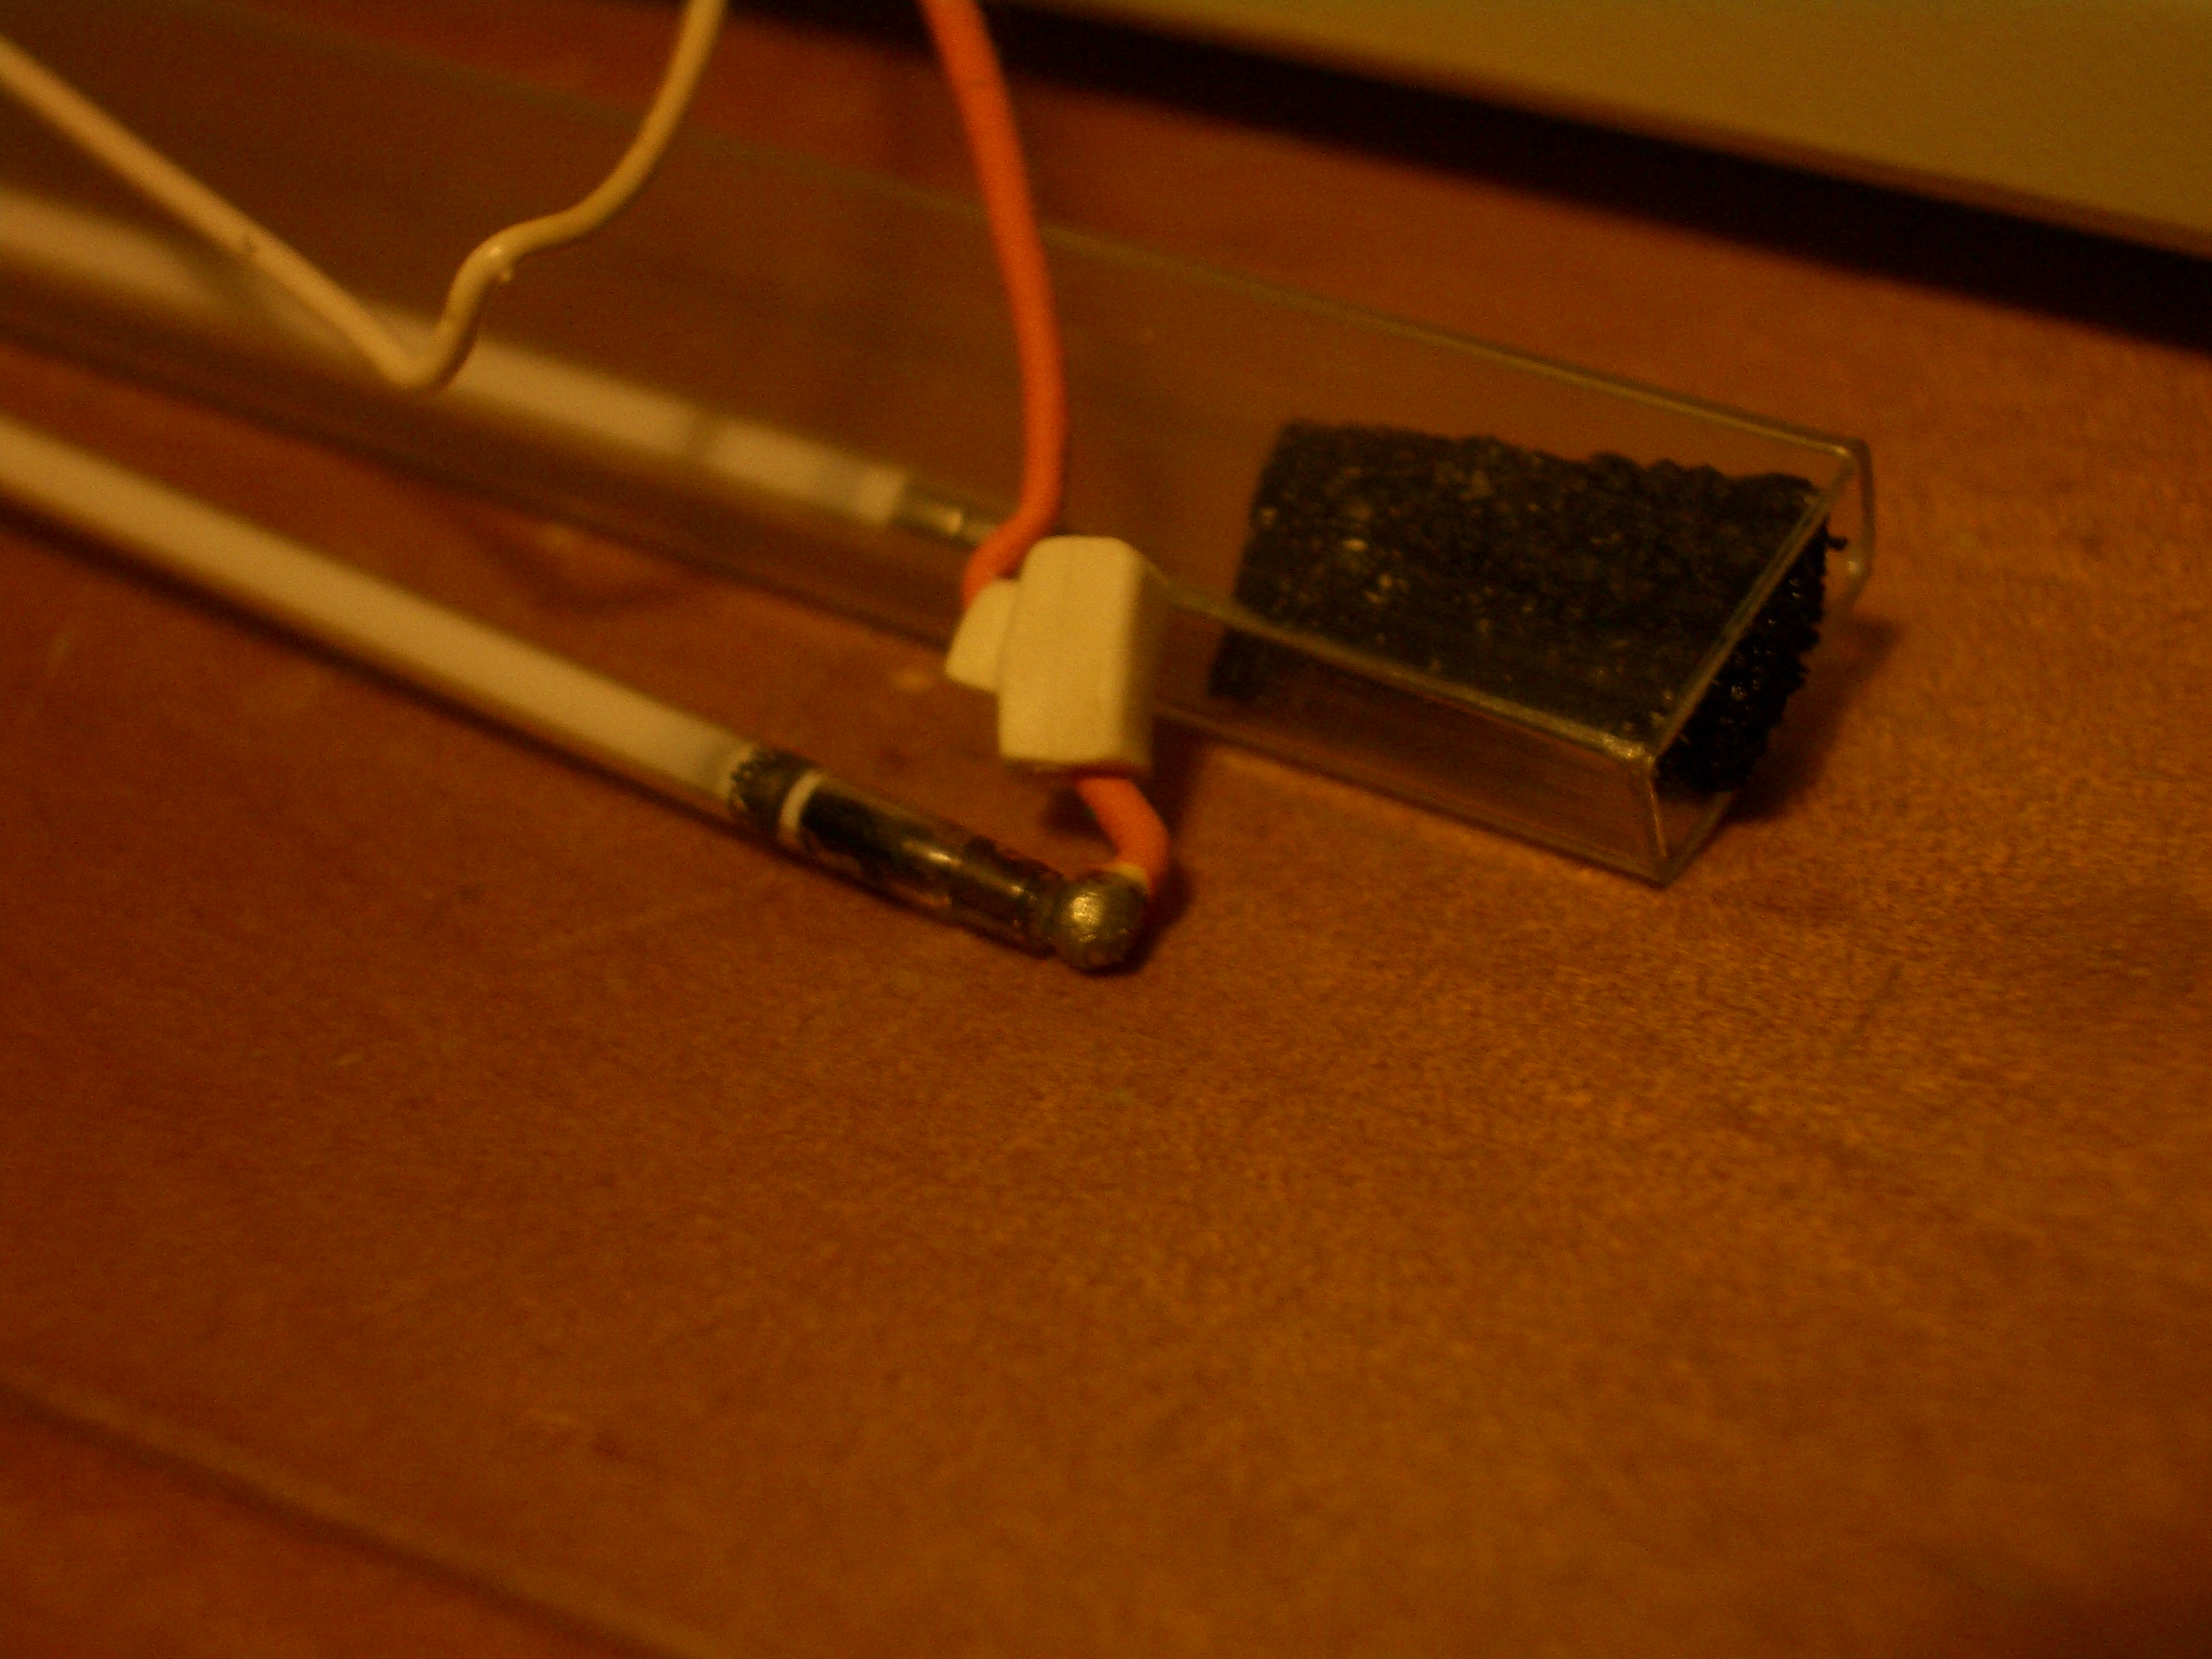
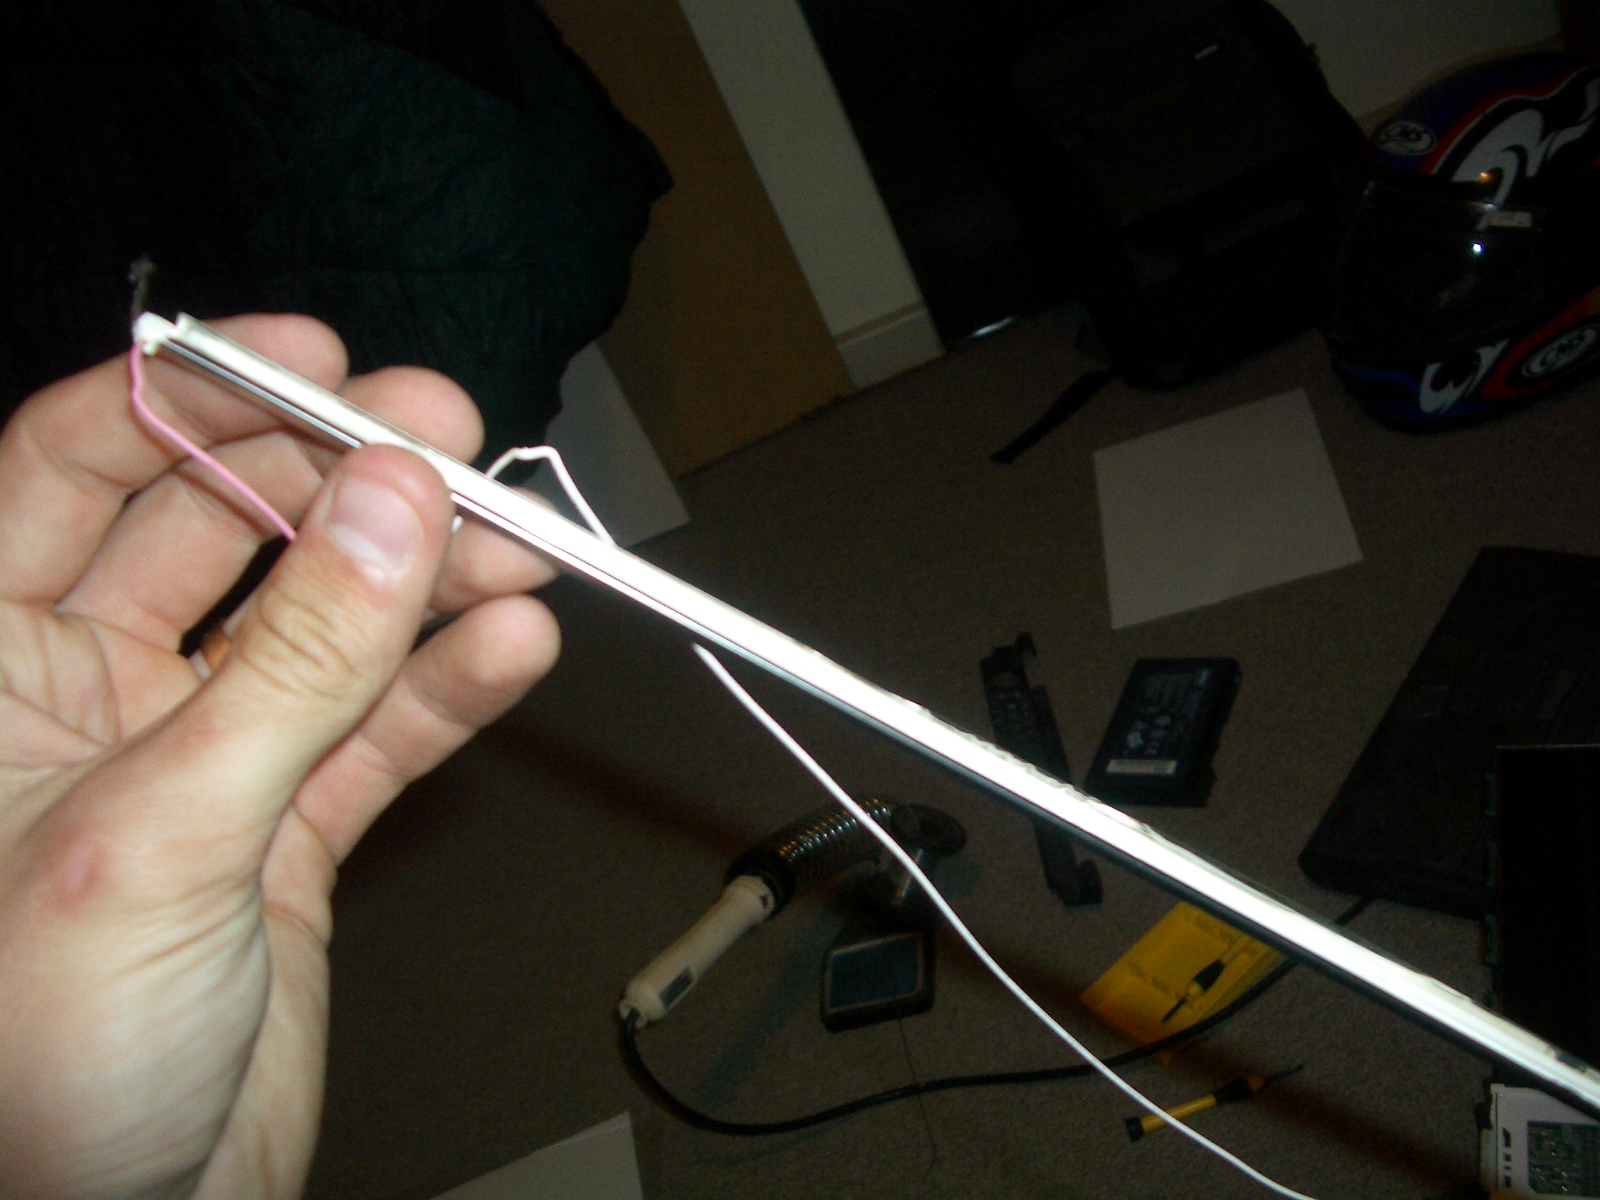
The backlight arrived! The CCLF for a laptop is very very fine. It’s only 2mm thick but 292mm long and made of glass filled with pressurized gas! I was extremely careful working with it.
- Cut off most of the electrical conducts on the CCFL
- Soldered the wires from the invertor plug to it
- Ever so gently put the rubber gromits over the end plugs
- Plugged in and tested the soldering was ok
- Gently put it into the cradle it came out of

Drat! It’s too long by a few mm. Looking at it I saw one of my solder joints were preventing the rubber grommit from sitting properly. Hence I gently moved the rubber grommit a little more …. snap …. Look of disbelief…SHIT!.
I’d broken the backlight in half. Admittedly really was caused by me rushing and not being careful enough. Hence back to waiting for the next order to be placed.
It was some months later when the lab placed the next order. This time throughhttp://www.rs-components.com.au. The backlight was about the same price but once again, the shipping was the killer.
Eventually the order was placed and I piggy backed on the shipping again (anything over $100 is free shipping – the CCFL was $25AUD). Sadly when the CCFL arrived – in the worst packaging I’ve ever seen, it was already broken. I rang up RS and they told me what to do to return it. A few weeks later (after a number of chase up phone calls), the replacement CCFL arrived. I delicately took it home. That night was repair night. This time however, I was determined not to break it.
By this time it was a good 6 months after I’d pulled the laptop apart. Hence my memory of how everything went back together was a little sketchy. Hence I decided to use the broken backlight and see if I could place things back together. 15 minutes later I was confident I knew how things went.
Once again I:
- Cut off most of the electrical conducts on the CCFL
- Soldered the wires from the invertor plug to it
- Ever so gently put the rubber gromits over the end plugs
- Gently put it into the cradle it came out of
This time it fit ( Just! ). The rubber grommits really made the whole light hard to put in the cradle.

However once it was in place it was a matter of putting the screen back together.
Putting the LCD back together
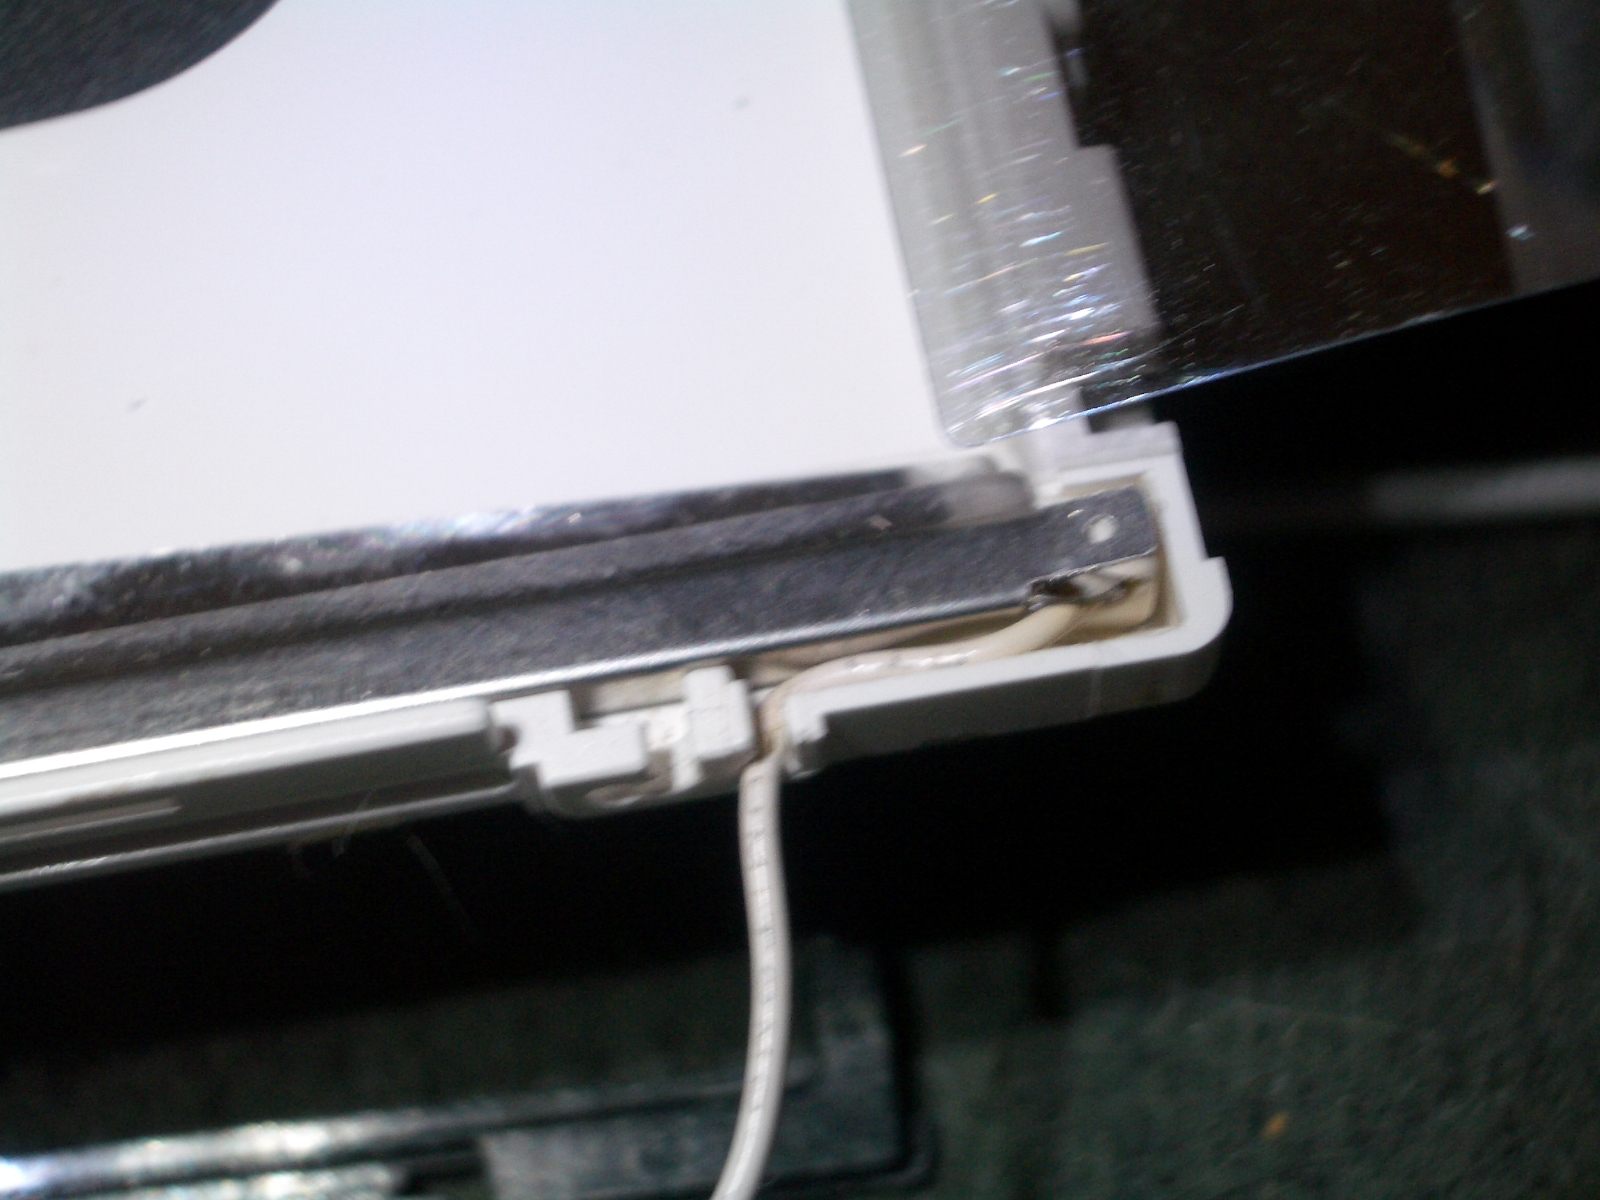
With the CCFL in it’s cradle, it was time to put things back together.
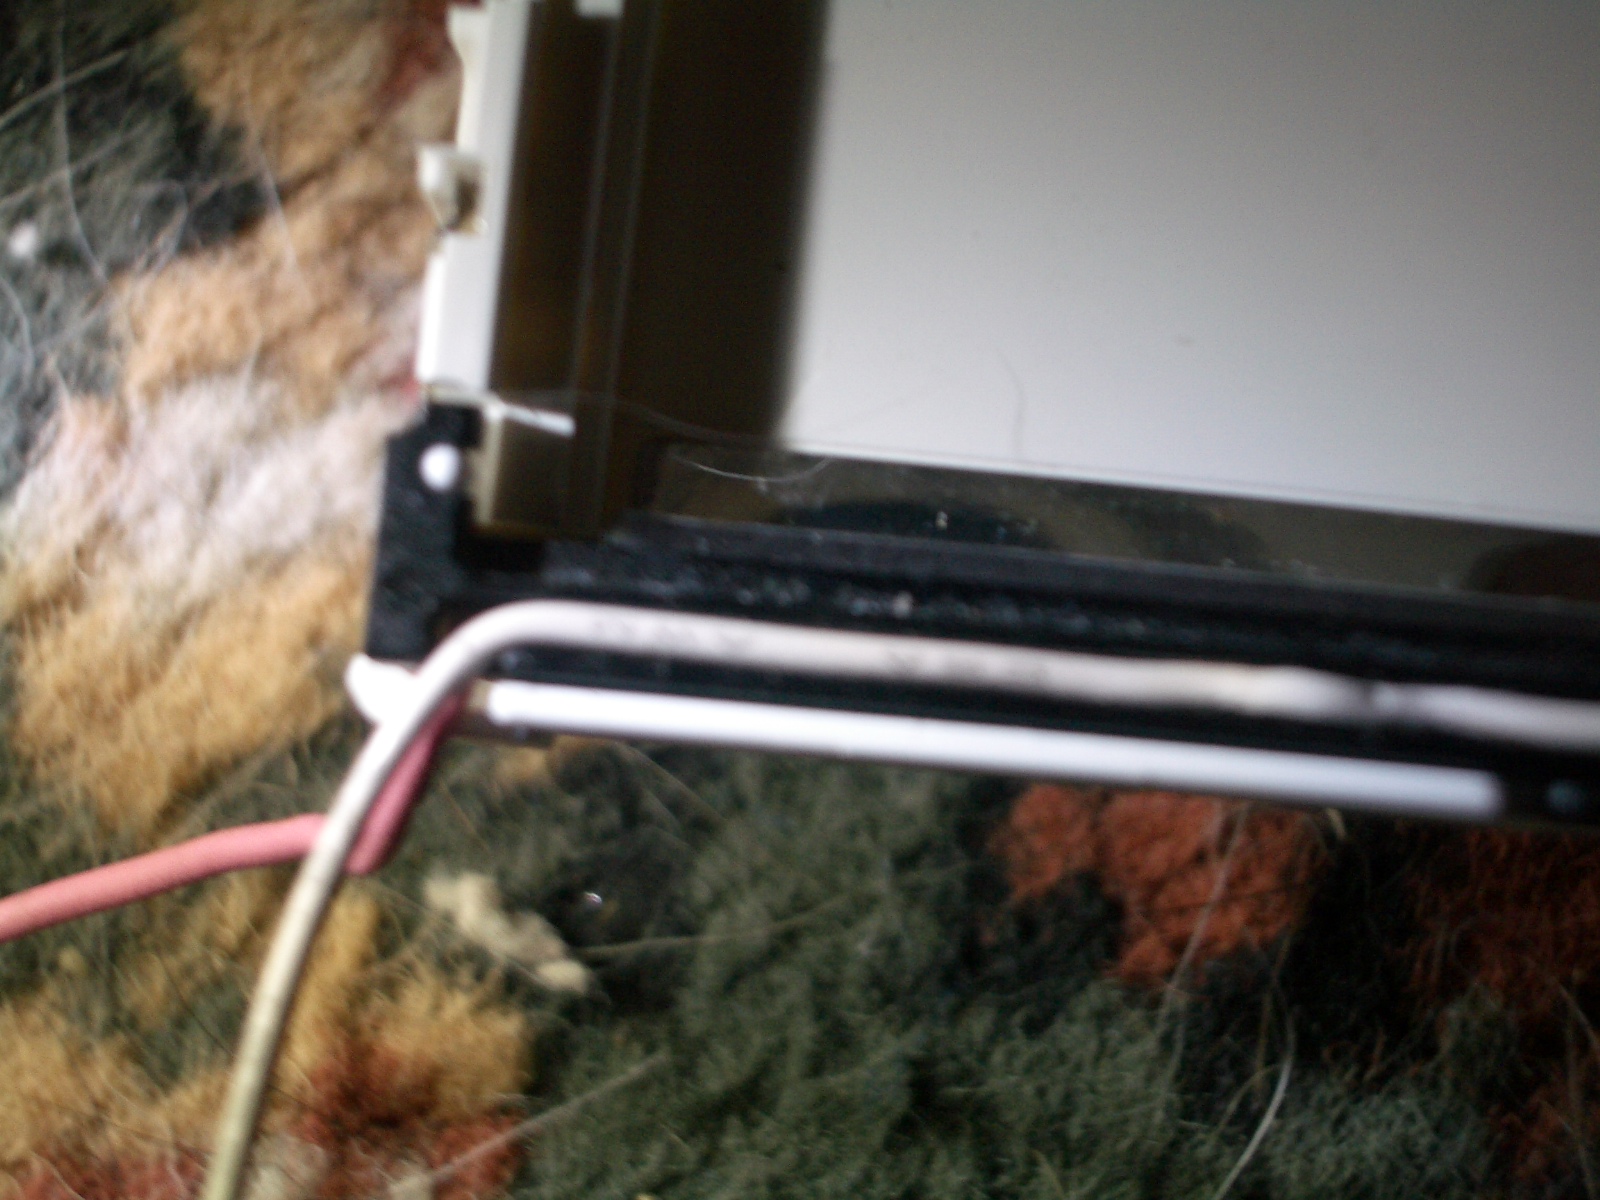
First the clip that held the cradle in place was put on and the wires for the CCFL were cliped into the clip.
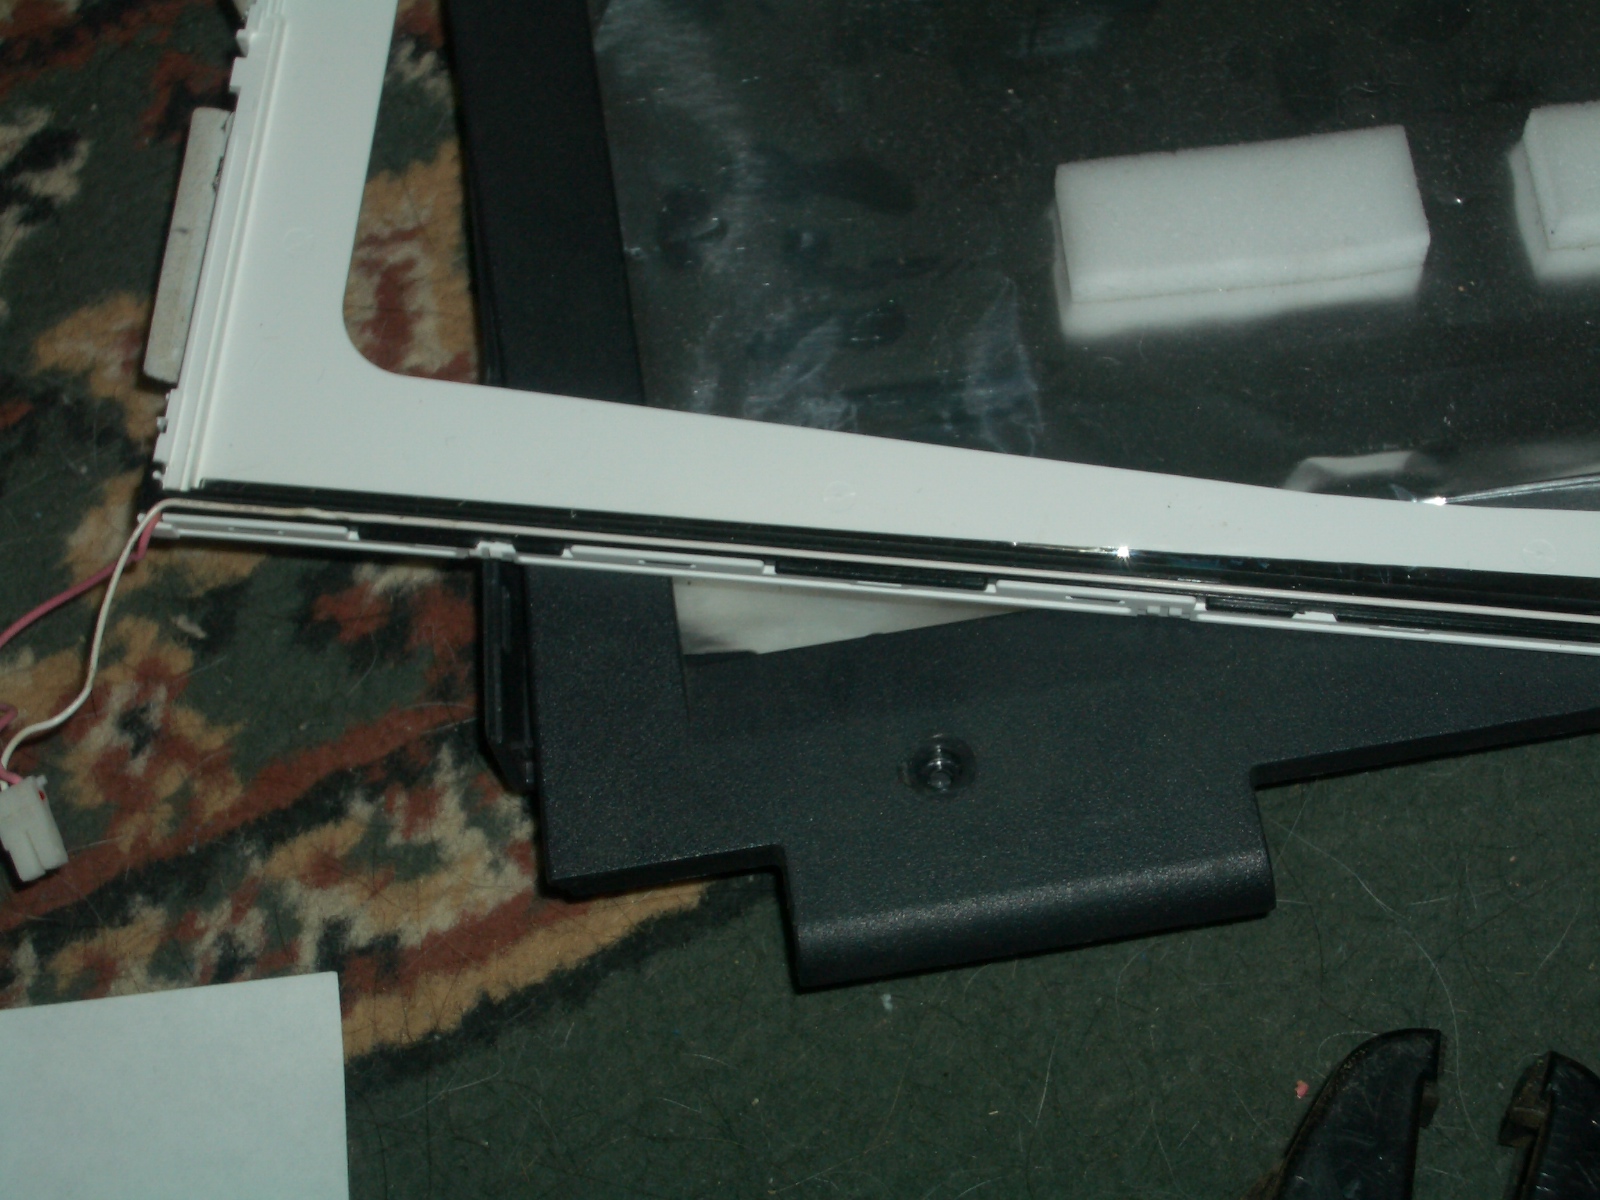
Then the LCD filters and lenses needed to be put back together.

In order to get the CCFL out, I had to pull apart the LCD screen. For those not familiar with LCD internals, there is a glass panel illuminated by the CCFL. Then a whole series of filters and lenses to focus the light on to the actual LCD crystals.
Now I had to put all the lenses and filters back in the correct order so the screen worked – this took a while. The wikipedia page (http://en.wikipedia.org/wiki/LCD) proved to be extremely helpful in this respect. Trial and error eventually found me getting things right.
At this point I noticed lots of spots and marks on the screen. Due to the 6 months wait, dust & hair (we own two cats & 2 dogs) had found it’s way in between the lenses/filters. Another 30mins later and 99% of that was gone.
It was done!
The finished product
With the LCD screen back together, all that was left was to put the LCD into the plastic bezel and everything else back together. That was the easy bit!
Now I have a working Dell Inspiron 8000 Laptop screen with a total replacement cost of $35 – even cheaper if I hadn’t broken the first CCFL!
Hence anyone who thinks that $400+ is a rip off for a new laptop screen, has a bit of technical knowledge and a steady hand can fix their own screen!
